This
is the first version of my translation from German to English.
I
would appreciate if someone could correct all writing errors!
You
can send mails to: [email protected]
In the following text, I present my experience with building of a diatonic accordion.
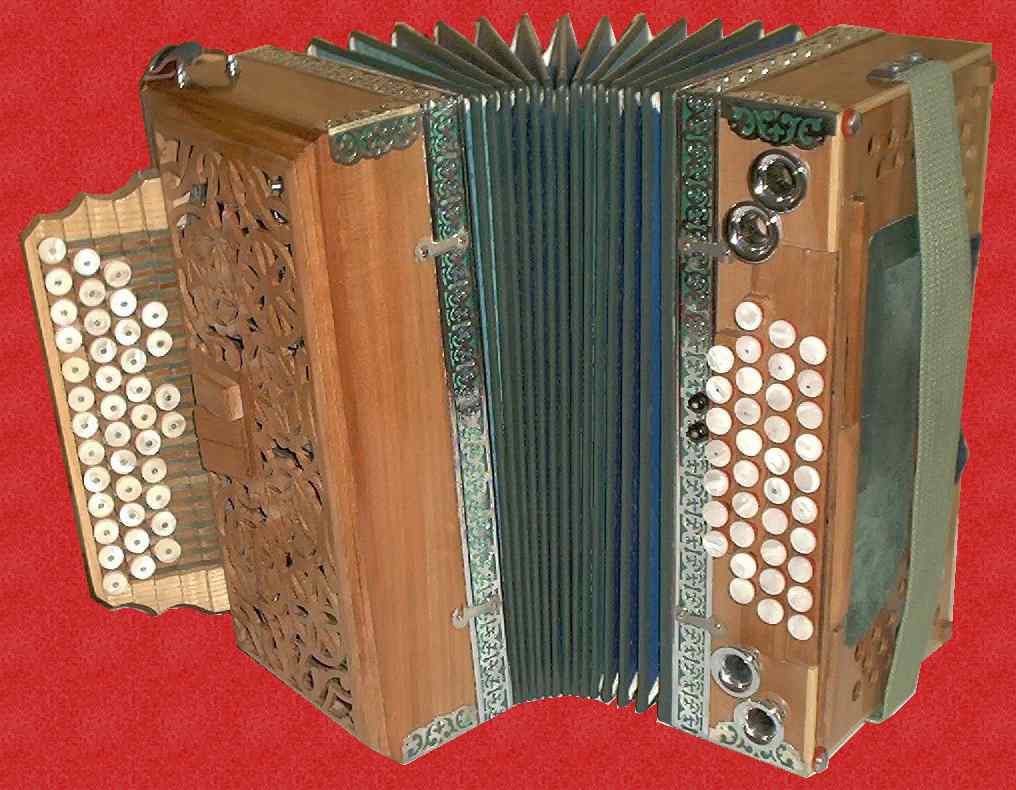
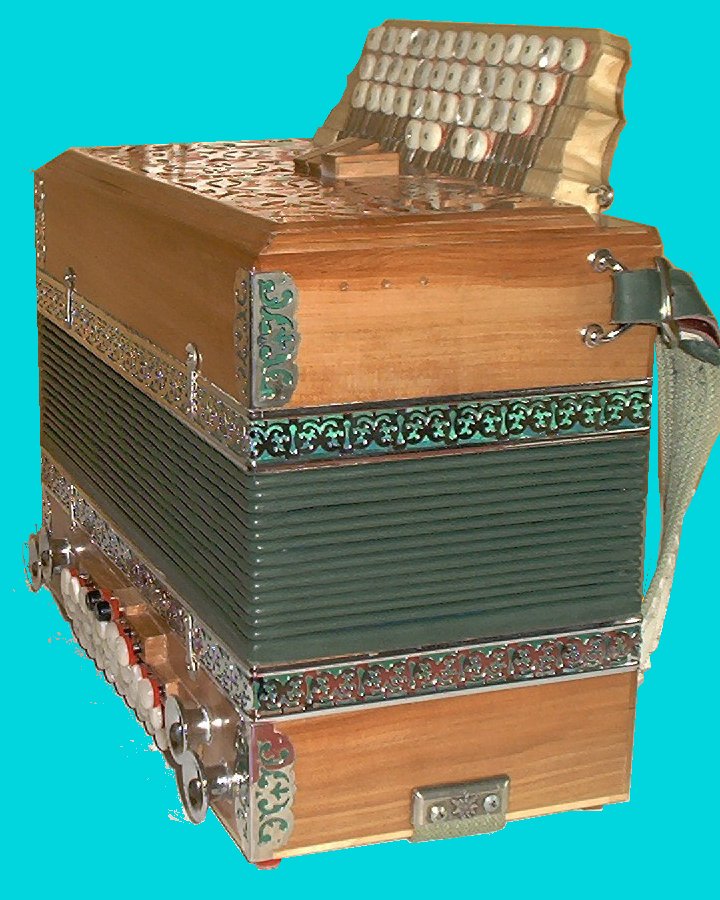
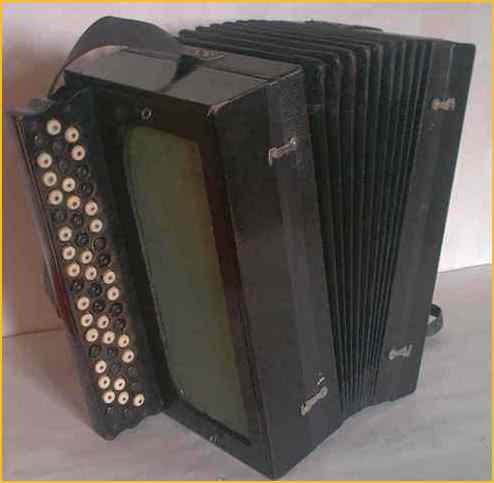
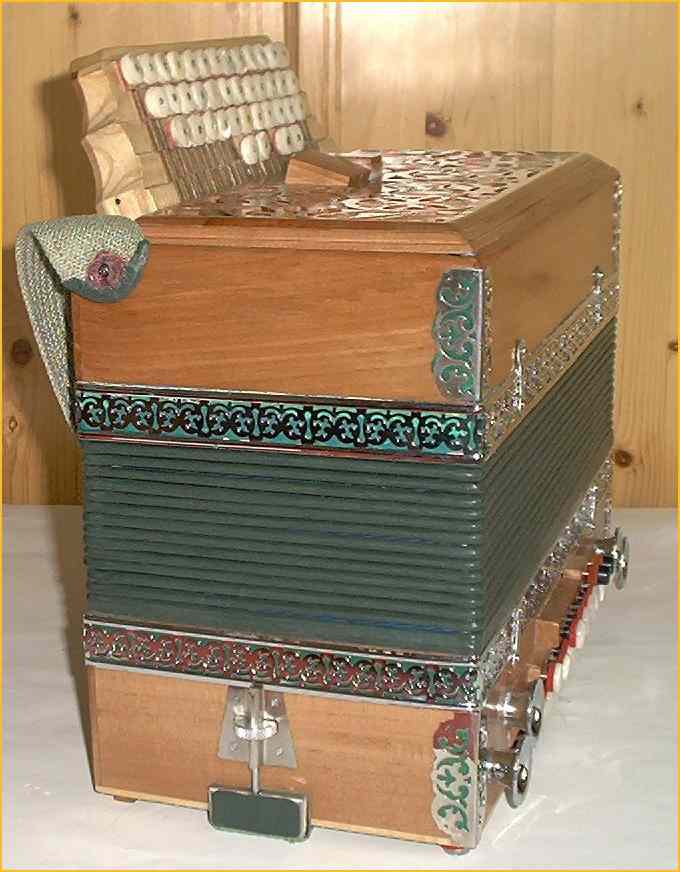
Weight: 7 kg, length: 37.4 cm, width: 18 cm, height with keyboard in the closed condition: 34 cm
40 treble keys and 39 bass keys, 3 choirs over three keys switchable.
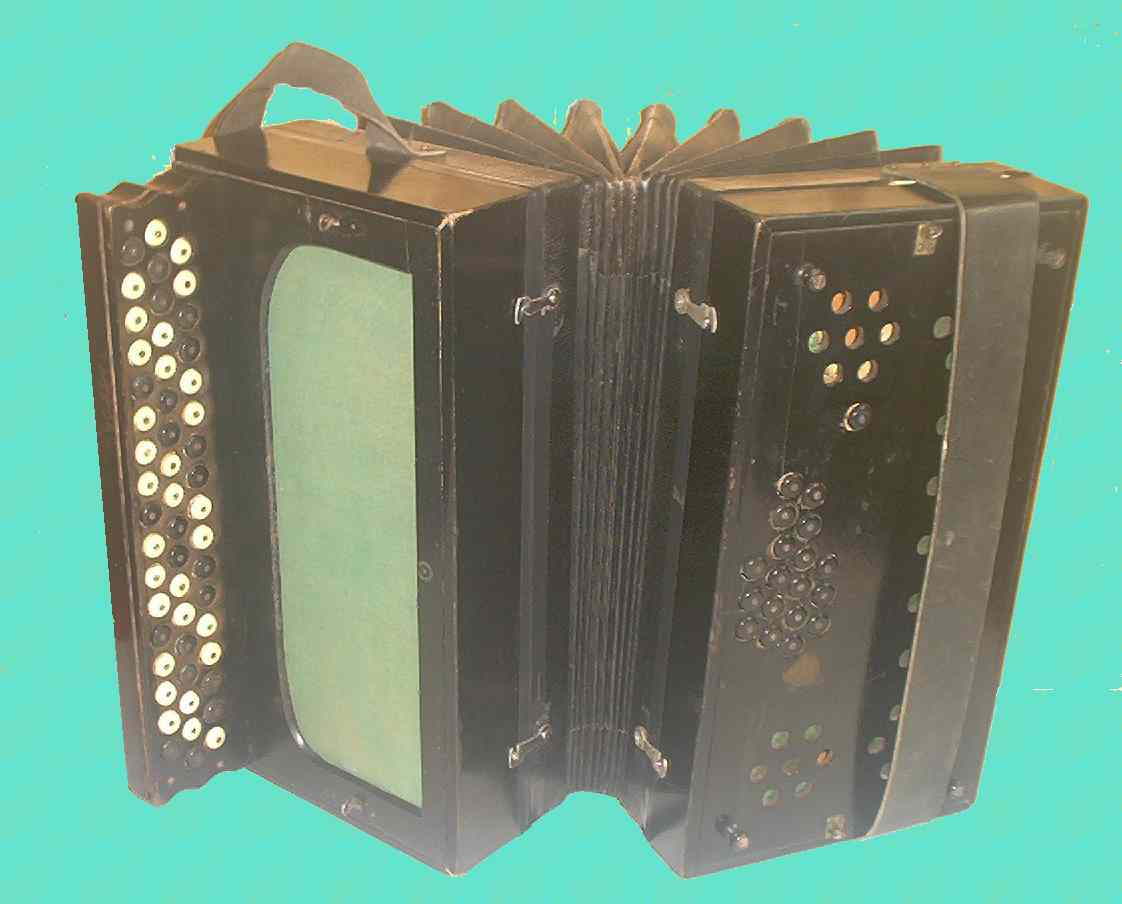
Today accordions with free reeds tongues are not made in pure handwork in central Europe. The skilled-labour fabrication of chromatic and diatonic instruments, yet in the first half of the last century it was far spread however. Austria played an essential role under development of the diatonic Viennese accordion (later called steirische Harmonika) and also for the chromatic B key accordion ( Schrammel Accordion(Budowitzer)). Later Castelfidardo in Italy and the Vogtland; in the music angle of Germany and Luny in Czech Republic attained at meaning. In Germany, Czech Republic and Italy the produce reeds also today. And naturally also accordions made partly by skilled-labour and machine work. However, as my knowledge is, many accordions are produced in Switzerland, in Austria, and in Slovenia. Essentially many instruments are made with Parts from Italy, Germany and Czech Republic. In Klingenthal and environment (Germany), there are today also a handful of good workmen. For example Mr. Schneberg form Zwota makes every desired accordion. In Vienna however it seems nobody is correctly able to construct and build an Schrammel Accordion. Correction at 2005/10/24: I visited the last Vienna Accordion builder: You can read about it: Visit at Mr. Karl Macourek, the last Accordion builder in Vienna.
I am personally self-taught and I have discovered my love to accordions 20 years ago.
Because I had the need to repair an old Novak accordion.
Directly on that I became acquainted with the 86 years old Man Mr. Hans Salcher. At that time Mr. Salcher was already very sick. Mr. Salcher played accordion in a Schrammel quartet for a long time. In the '50th `s he also performed on the radio. His father was Harmonikabauer; (accordion builder) in Freindorf and he repaired next to his occupation as an official and later in retirement accordions. In many conversations, he told me details about the construction and the repair of „Schrammel Accordions“. He showed me how to make reed tongues by hand, to rivet tongues and to tune reeds and also to repair and build bellows. I remember very well that he placed some "homework" for me. Also he did put special value on my ear education.
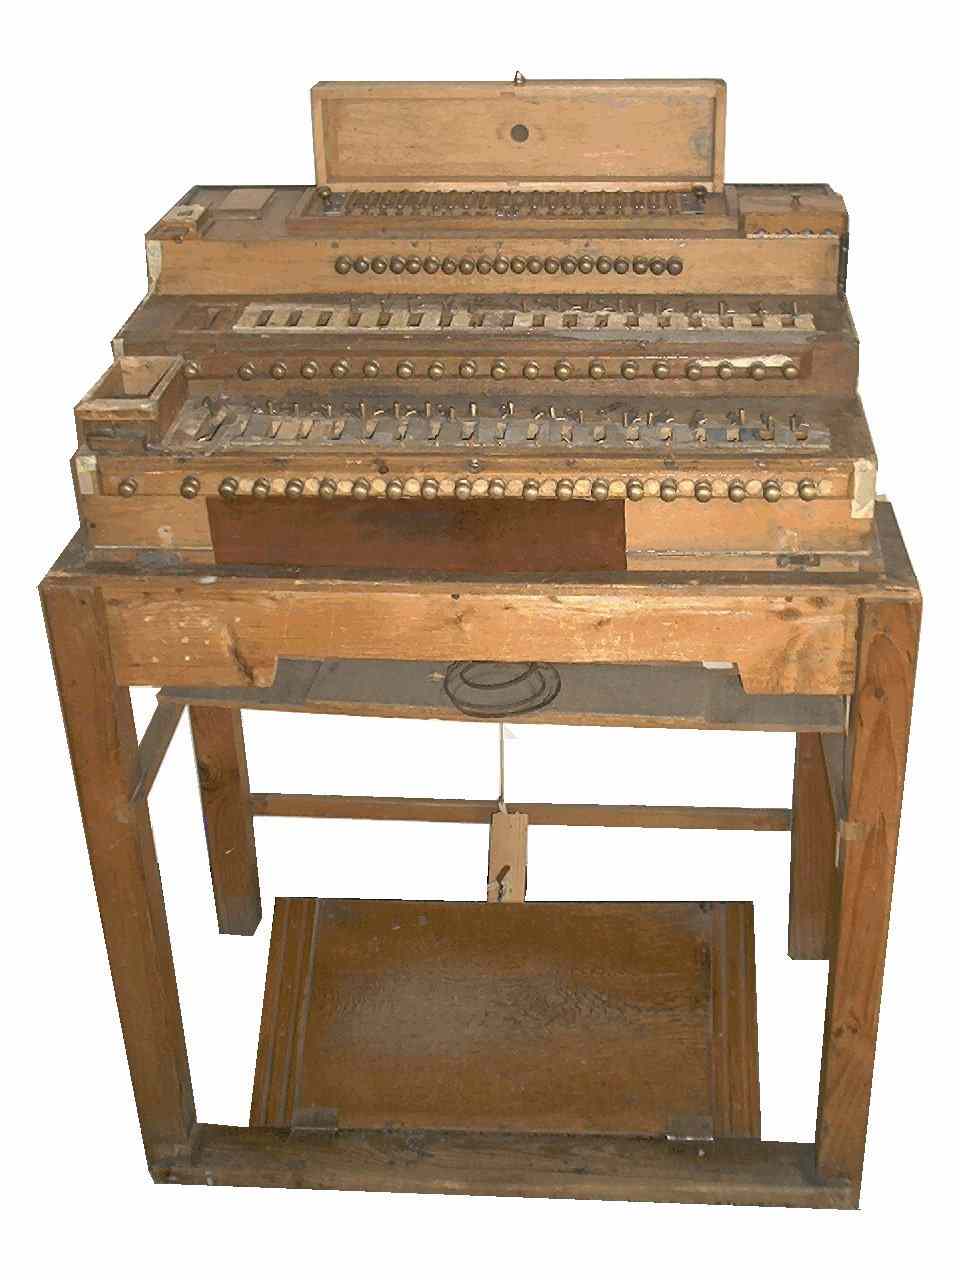
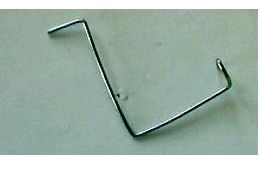
Shortly before his death, he gave me his tuning table (picture of tuning table) as present to me and also many tools, like screw clamp bellow press, hand drilling tools, drilling „templates“ for the building of Schrammel Accordions and many parts he still had left over of his father, were at the same time also many old voice tongues. I recovered also a complete Schrammel Accordion.
Shortly on that I restored a three-row Novak accordion for me. Renewed the bellow, I did take apart this into all components, fixed the fragmented housing parts. I rebuilt the keyboard, because the keys did not function properly due to warping, and I tuned the reeds.
At this time, in my mind the wish came up to construct a new squeeze box for me. Because of professional and family reasons I did not have the time to put this wish into reality. I am TV Engineer and master, worked on microelectronic evolution, computer technology and network technology and I am today teacher for practical activity on technical topics at a „HTL“ (technical high school). However my love to the handy craft is unbroken. I work today also gladly with wood and metal. I had the first contact to the carpenter craft work in my early youth. At that time i had the opportunity that a carpenter master in retirement did show me dexterities. We constructed together a table that I still own today. He showed me how to polish with shellac and much more.
Description:
To construct an Squezzebox in handwork many skilled-labour activities are required. And my respect toward the old masters increases, more and more every time I try something new myself.
The arrangement of keys, the bass system, and the tuning of the accordion are described on extra web sides:
The harmonic construction of the diatonic squezzebox
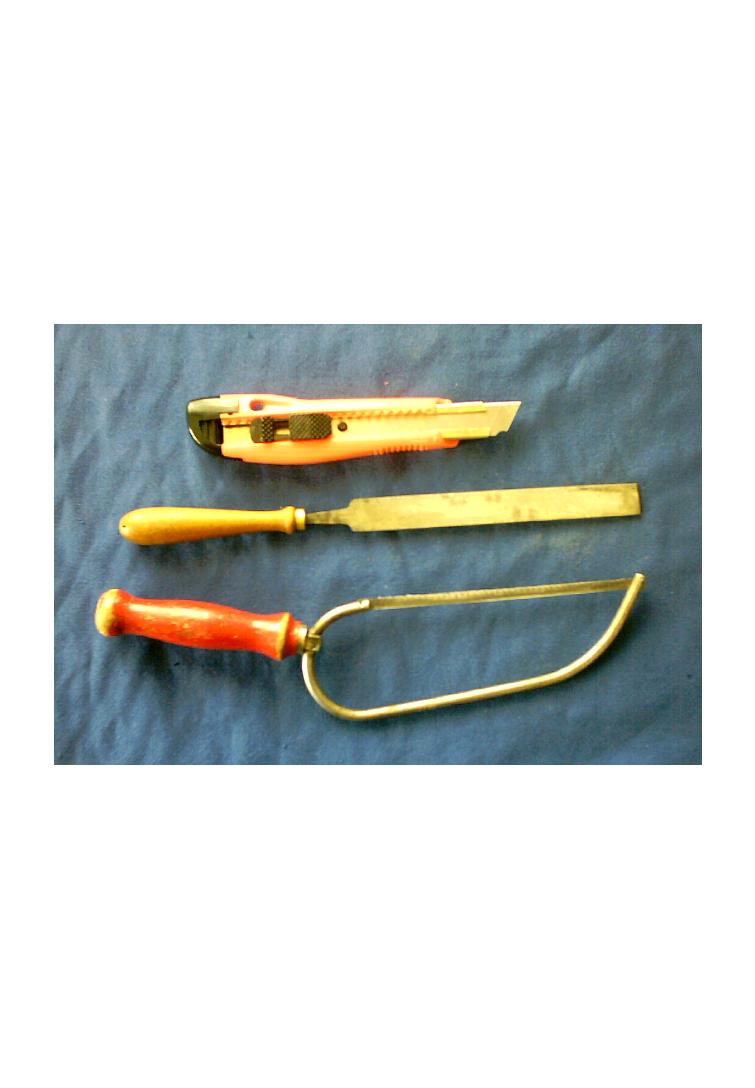
To prepare the housing I needed some tools: circular saw, planer, grinder, and a drilling machine. The required parts for the bass part, the treble part, the keyboard, the covering, and the reed chambers are quite little. On my planer, I can plane down to 3mm thin strips. And the width with 20 cm is wide enough to plane out the wider parts for the covering and the bass action board.
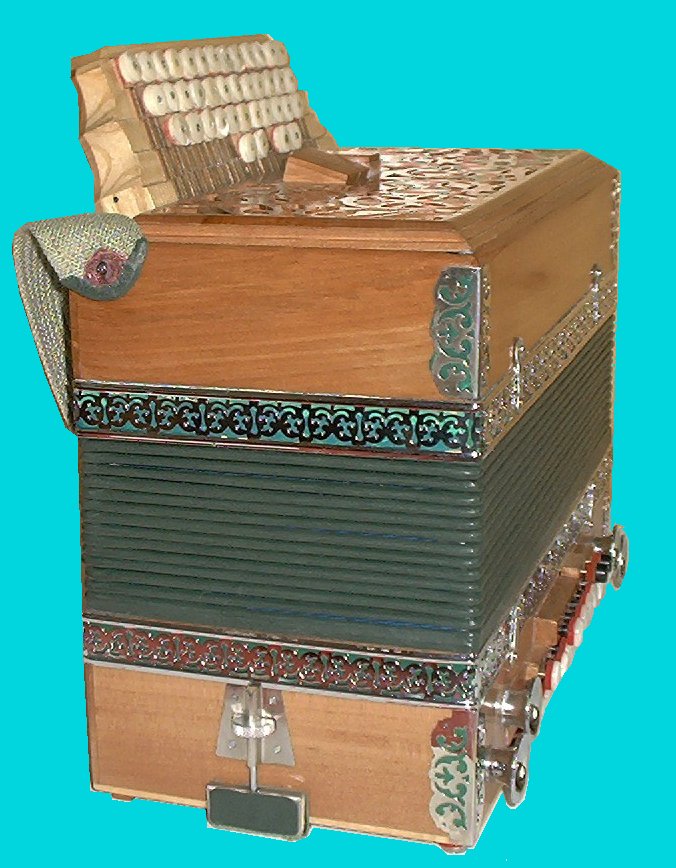
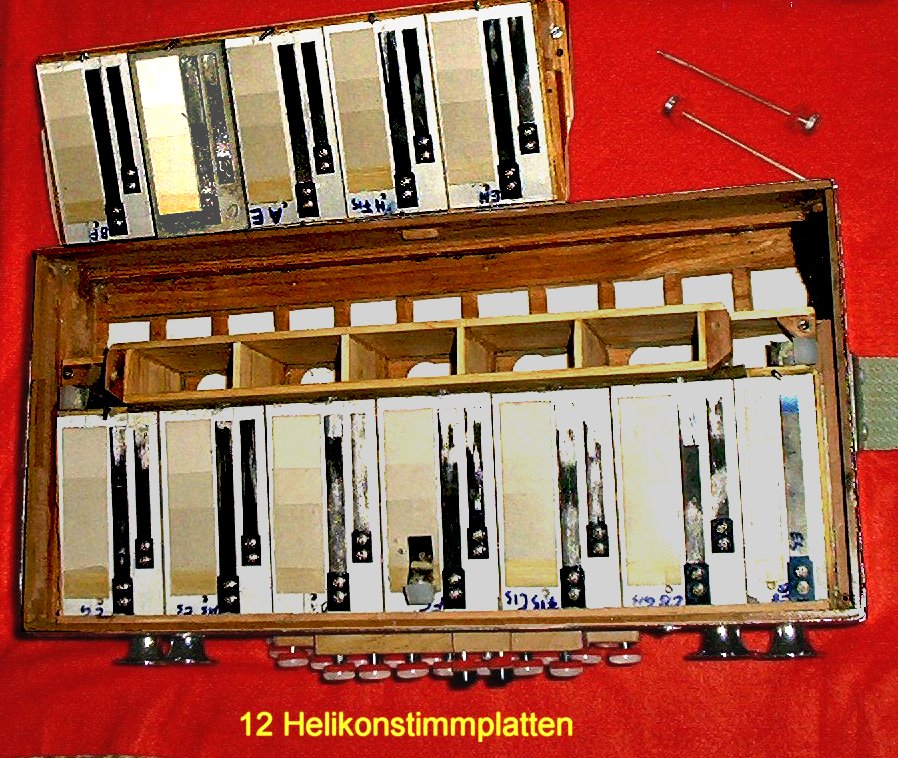
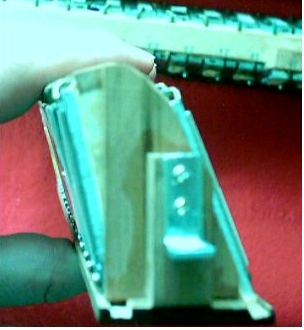
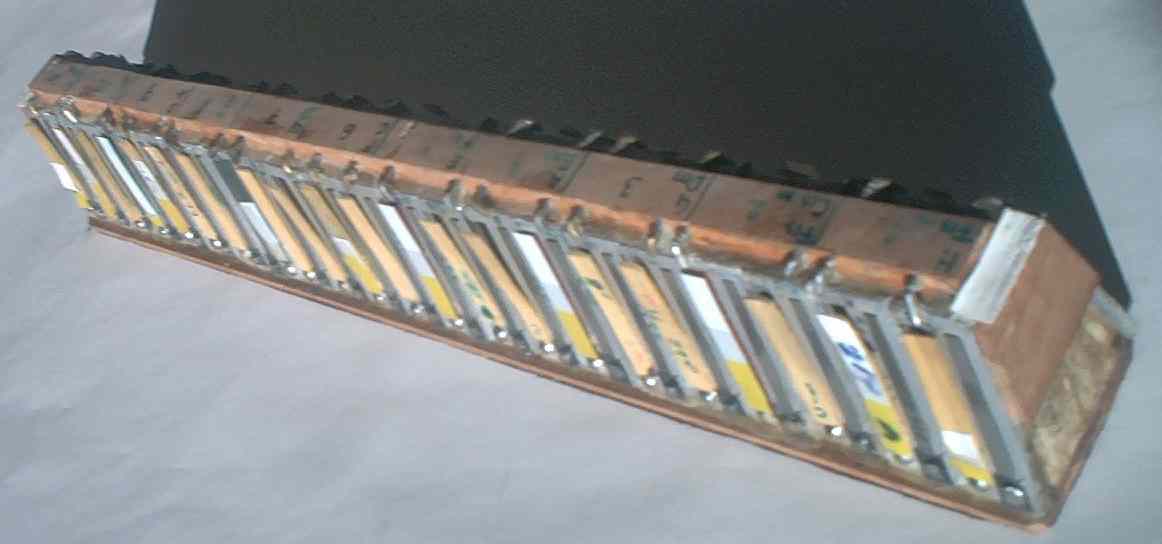
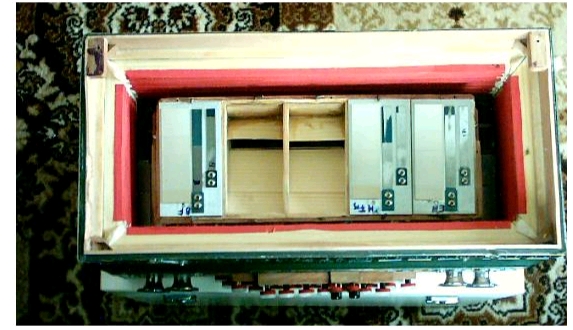
After I had considered the arrangement of the reeds in the treble and in the bass, I did begin with the frames for treble and the bass. I glued all housing parts with pearl glue (bone glue). Like usual on violins. Warm glue dries quickly and it is soluble under steam too. In the long run pearl glue holds better, because it makes the same moisture variations as the wood makes. The related wood was an over decades stored pear tree, apple tree, and in part chosen ash tree. All external supplies parts exists made out of pear tree up to the edge strip of the bass part that are made out of ash wood. In the keyboard, the thumb strip and the end pieces are made of ash wood. The bottom disk with the sound openings is made out of apple wood. The „Helikonbasskanzellen“ (resonating chamber) made out of best spruce with chosen grain. (Picture of the incorporated Heliconreeds),(2. Picture, of the Heliconbass seen from the side) all breadth vines of the Ton chambers are made out of balsa wood. The grain in the bottom disk and the longer strips of the ton chambers is important for the resonance characteristics. The elasticity in breadth direction should be higher than in the long direction. Apple wood and spruce have uniform and distinct year rings. Pear wood is easily worked with and looks nobly. The breadth vines in the Helicon ton chambers are made out of balsa wood. balsa wood is very light and elastic; this leads to an improvement of the talk reaction of the Helicon tongues. The turn around board in the air canal of the Helicon bass chambers can be shortened through use of balsa wood or could be completely left off. For the remaining Helicon reeds, with are built in as second flour, the airway is longer, this leads to stronger basses on this reeds that are in the floor construction and to somewhat more overtones in the sound. The board for the turn around path is made out of spruces veneer. The Helicon reeds are secured with screw hooks, and sealed with leather gasket. At the bass part, an adjustable hand strap is located. Two keys (strips) for the air flaps are attainably arranged so the can be reached with the thumbs and little finger. (Picture of the accordion seen from bottom side) (Picture of the Bass side)
Building drawing for the bass part
Building drawing for the treble part and key arrangement of the treble part
The action board was equipped with all holes before installation in the bass frame. The frame for Bass reed panes was glued together before it was inserted into the bass frame. Crepe adhesive tape was helpful until the glue was dry. Screw clamp could not be used for small parts only for larger parts. The treble side is constructed with three „sets of reeds“ and index slides. The action board with the index slides is from Italy, this action board was planned however for a chromatic accordion. I cold cut the aluminium action board on a circular saw with the hard metal circular saw sheet, for my needs and screwed it into the wood frame. The edges were sealed with leather strips and bees wax.
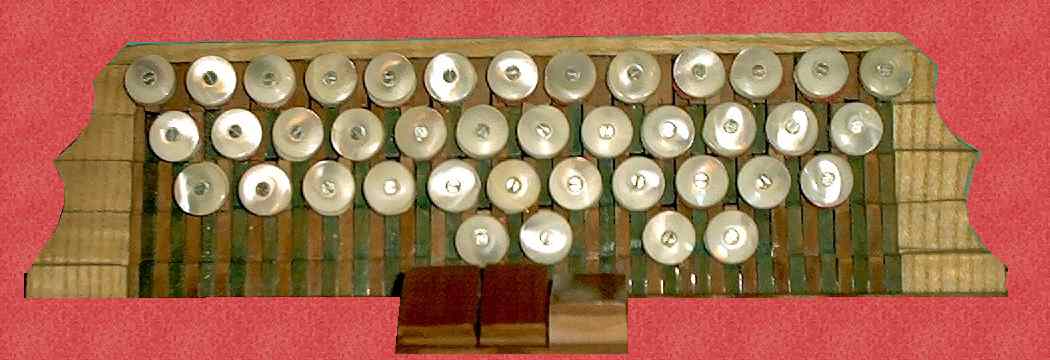
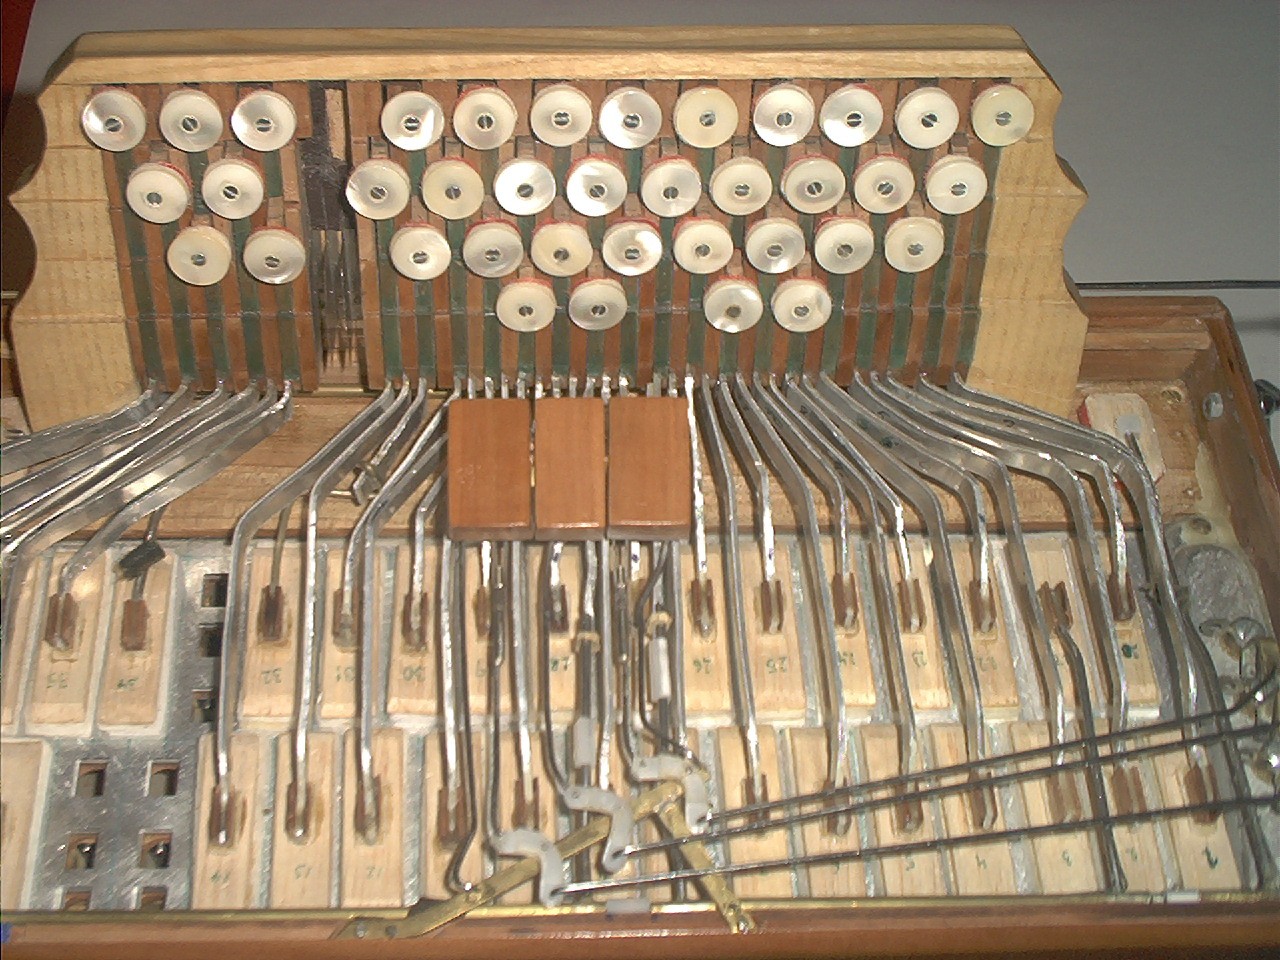
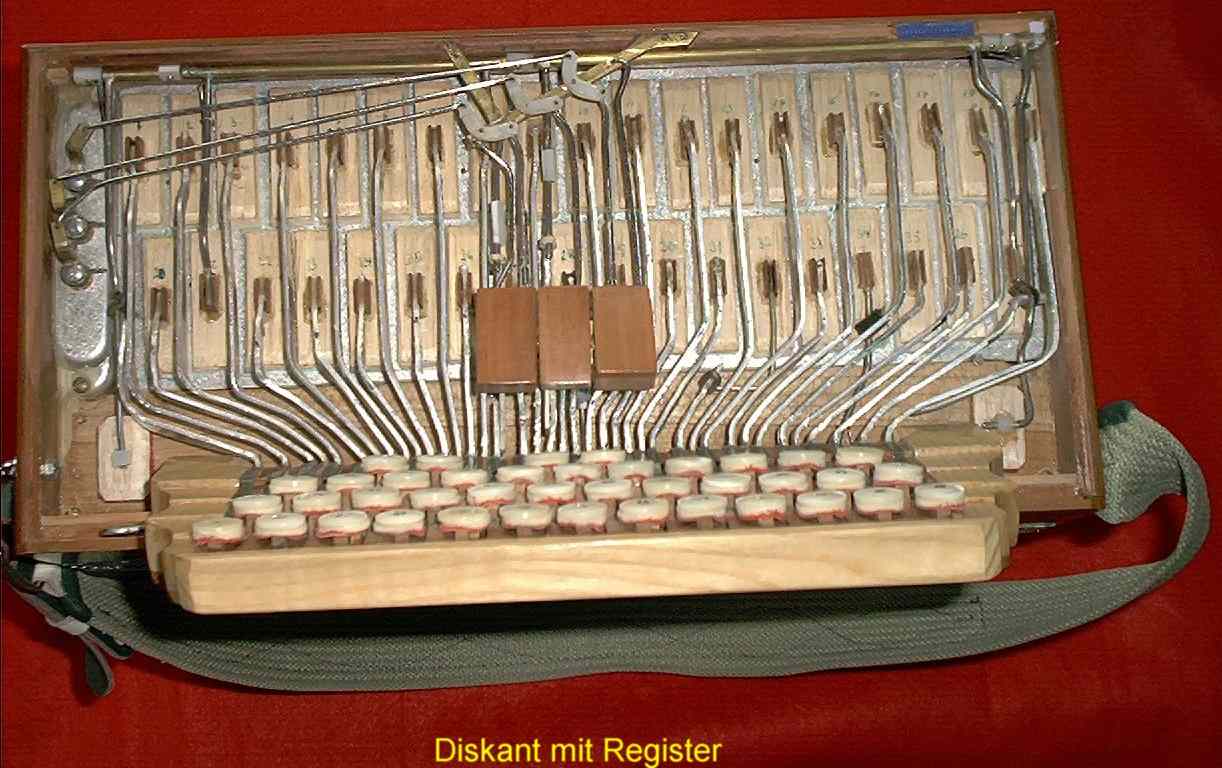
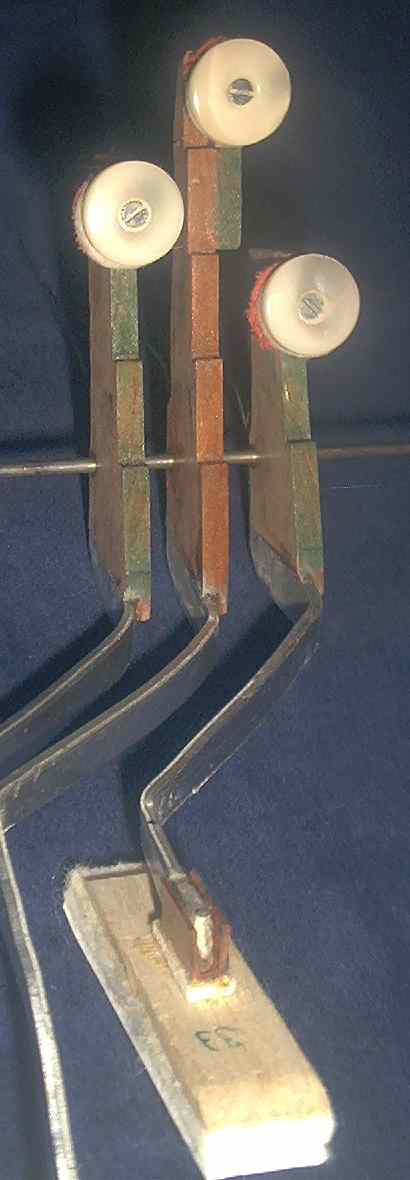
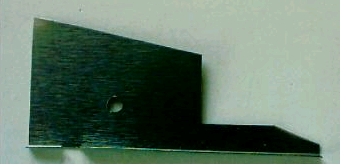
The treble keyboard consists of a 4mm action board with a thumb strip and two End pieces as a border on two sides. From row to row, it is stepped for 3 mm. They held in the dimensions very small, since I do have little hands and short fingers, therefore I can reach the keys more easy when playing. The key mechanic (picture of the treble mechanic with index switch, picture of the treble mechanic seen from the other side) is similar to the „Schrammel Accordion“ only the 4th row is on a separat axis. However the keys are arranged like on the „Steirischen Harmonika“. The bear wood levers (picture of three levers) are openly visible. Many levers are staggered glued therewith a storage on an axis is possible. The Buttons are not in a flight with the bearing, this is not eye-catching when observed, and also it does not restrict the function of the keyboard. Under the key, a spring made from piano string steel is mounted. Like this is also the case on current wood keyboards. To adjust the feather pressure it is a rather lengthy job, because the air flaps have to close correctly and the keys have to move and function uniform and easily. Each key did get a brass bushing as a gliding bearing that was tuned with a hand reamer to fit 2.6 mm. This bearing was glued into the wood leaver with fast glue. The mounting of the bearing is very critical because the leavers are not allowed to touch each other. Between each key, a stainless steel union elbow with 0.1 mm thickness. I have used the sheet metal of old diskettes. I glued this union elbows with two components glue on the action board. The sheet metal union elbows do have drilling with 2.6 mm through this drilling the joint axis. The union elbows were glued after all levers and union elbows ware without springs on the axis. Two components glue hardens quickly if it is put into oven for hardening. I had to take apart and put together the keyboard again, innumerable times forming a unit until all functioned correctly. The 4th row is arranged on two short 3 mm axes with are mounted further interior, so that the flaps opened sufficient. On the levers, only the visible part is made made out of wood. Each 2nd lever is partial green varnished this gives the impression that each lever is in a line with the key. The levers are ca. 4 mm thick. Near the bearing, the wood strength is reduced to 2 mm and a 2 mm of strong aluminium sheet metal is glued on with two components glue. That aluminium sheet metal stiff becomes toward air flap narrower. The aluminium levers were bent for each flap suitably into the corresponding form. The aluminium lever has low weight and is stabil enough not to vibrate when in action. All flaps except two are arranged in two rows, however three and a half key rows are available. To reach around to this distribution three turn around leavers had to be incorporated, one under the keyboard and two at the front of the treble box. Two tones became incorporated, one without index switch above and one beneath the keyboard. These keys have also turn around leavers. This turn around leavers work similar as the constructed mechanics in the bass part. The buttons in the treble are made made out of pearl courage and with a felt underlay screwed with 2 mm wood screws to the levers. The moving way of the keys is held very short. The air flaps consists of balsa veneer with felt and foam material area of support. Felt and foam material are glued with tree wax. On the Wood veneer of the flap, a Bears wood U profile with a felt underlay is glued. In the U profile the aluminium lever of the Key ends. After the aligning of the levers and the flaps, the levers ware poured with bees wax in the U profile. Wax can easily removed and gives sufficiently halt for the flaps. The complete keyboard is screwed on with two 4 mm wood screws from the inside at the rear edge at the treble part. Over the flaps, there are three switches mounted for the index switch, the have three turn around leavers and a linkage made made out of 1.6 mm Stainless steel wire to the index slides. The index slides and the bass buttons are from Dena in Castelfidardo, and the treble buttons are from Fa. Hirt the felt is from Fa. Jaklin in Vienna.

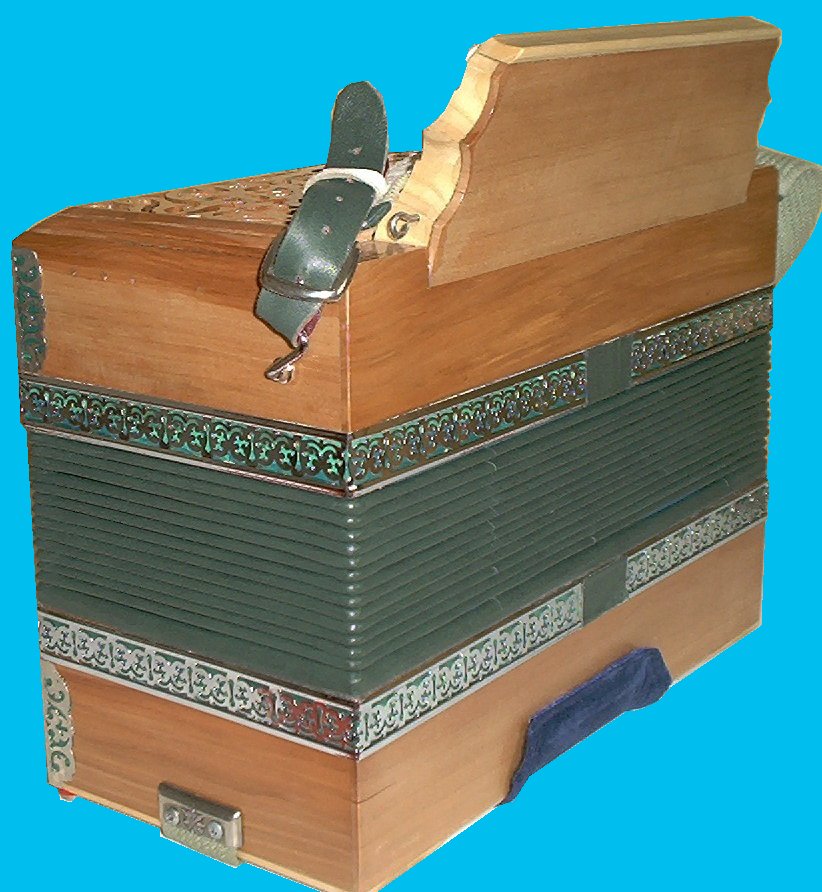
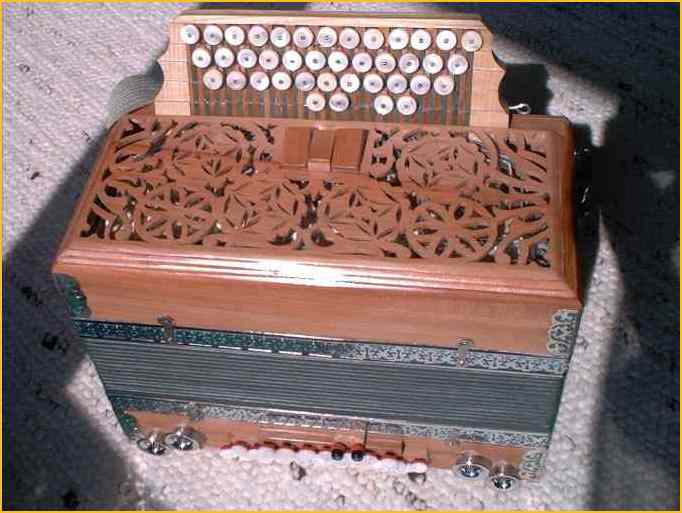
The covering (picture of the accordion seen from the top) is made out of 3 mm of thick bear wood, in which a pattern with the fretsaw was sawed with a personal characteristic pattern. The edges are rounded off somewhat. The covering is easily removable no screws are used. Under the covering, there are two screws located; this two screws secure the bellow to the treble part. The bellow and treble part are secured also with two hooks on the front to each other. The two hooks on the bass side are only for decoration. At the bass part is also a covering with air outlets. The air passages are made up with 15 Holes on places that do not became touched with the hand bales when playing the Instrument. In the area of the hand bale, a foam material area of support with leather cover is glued. Through the covering, also the air button (key - strip) leads with is attainably with the thumb. The strap at the bass part is adjustable at the underside in its length. The covering is fixed at the front corners with two screws, this screws go through the bass part, to the bellow. (Picture of the accordion seen from the bass side) are this screw removed, the bellow can be snapped off of the bass part if this two parts are strongly pulled apart, at the front. At the back of the accordion, there are no hoes or screws. The clothing is protected through that. Only beginning and end of the ornament strip are at the back, and this ends are covered with leather. I also deliberately left off the trimming at the corners at the back. (Back of the accordion)

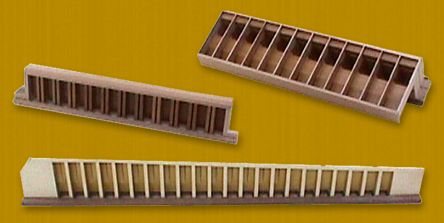
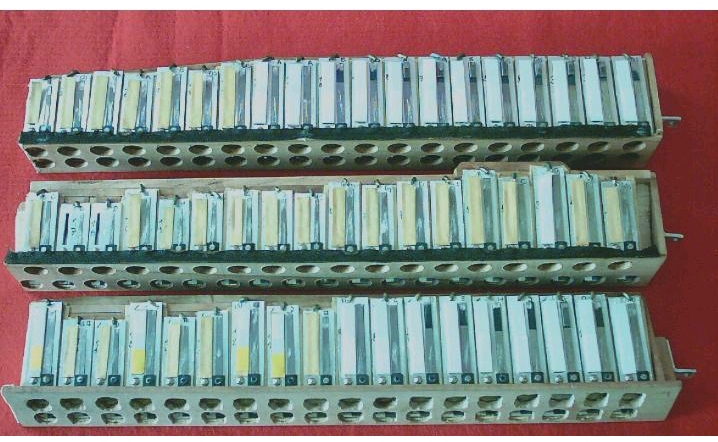
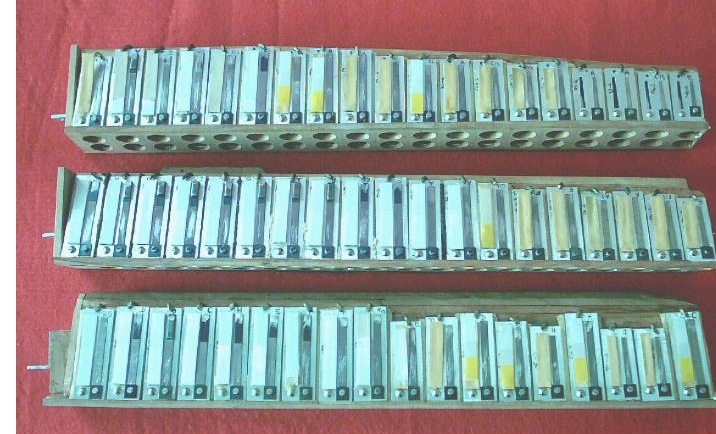
Reed-blocks (Picture of machine produced reed blocks) today these blocks become made out of resonance wood (fir), massively nut wood, MCF or cedar produced. That Processing is partial Traditional. Today the reed blocks become frequent produced with CNC, often the glued will be glued in the „immersion (or dipping) gluing process“ with Natural glue to get a better resonance quality. In my accordion, I have the reed blocks wood foot and peer back strip made out of bear wood and the chamber separator made out of balsa wood. Before I started to build the reed blocks. The distribution of the reeds (Picture of treble reedblock assembly) (Picture form the other side)had to be certain. Into the three foot strip, the drills for air passages were made with hand drills. This was made before the completion of the treble part and the keyboard because the drill positions had to be copied from the action board
![]()
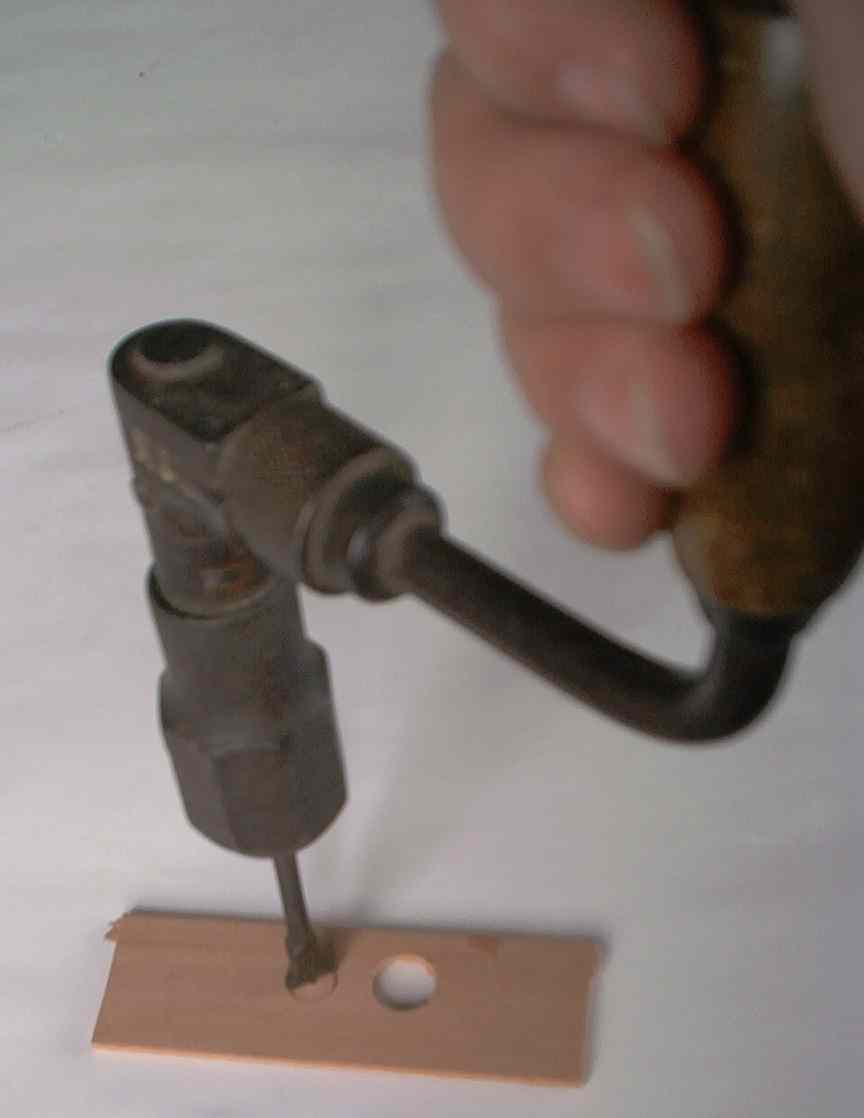
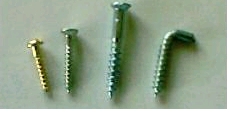
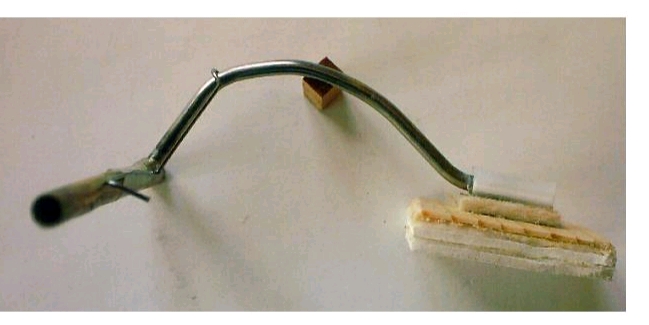
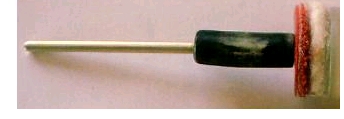
That the holes do not tear out, I have drilled all the air passages by hand with an old speciall wood-drilling tool. CNC drilling for a single piece is today certainly usual but costlier. The same applies also to the reed block. The three foot strip for the three reed blocks in the treble part were a single piece even after the drilling. I equipped the 3 mm thick wood board made out of bear wood with the all drills and divided then with ruler and wallpaper knife at the correct place in three parts. Cutting apart with the circular saw, the saws sheet width between the feet strips would be missing. Alternatively one must already consider this when transmitting the drills. Then the edges of the foot strip were grooved with a grove-like depression for the reeds. Moreover I have also made some wood placeholder, which I used for dividers of the chambers, so that the chambers became uniform. The chamber separators are made out of balsa wood this could be cut with the knives. The head strip was not entirely simple; it did afford changes too, because for some chambers the angle and also the thickness are different. Since the height of reed are different. On the low reeds, sufficient place had to be there, for a full kicking tongue. However for high reed chambers the volume is to mach. Adhesive tape and the placeholders eased the work. The area of support for the reed must be even so that it does not come to air loss later. After the gluing, a lot off work he'd to be done to get the area of support even. After the reeds were coarsely tuned and accommodated with valve leathers the were mounted on the reed-block, the valves are made out of leather and the size must be cut to fit for each tongue The reeds are from the Schaumanufaktur in Klingenthal. The Heliconreeds are made in Luny Czech Republic. Each reed did get a reinforcement hook witch ware made out of a 1.5 mm wood screw. The head of the screw became cat off and at the screw cane; the screw was formed to an elbow. First thin leather ware cut to strips and then glued with wormed tee wax to the edges of support for the reeds. So that the reeds could be secured easily and still be removable if necessary. The leather guaranties that no air passes trough where it should not. The reed sits in a groove below on the reed-block foot and on top they are held with the hook. Each treble reed-block has at the narrower end a little nose that snaps into a groove in the housing and at that other end a sheet metal elbow is mounted on the reed-block to screw down the reed-block with a wood screw in the treble housing. In the treble housing, strips off wood are glued in on the opposite side of the metal elbow to be able to screw down the reed -block.
![]()
The reed-block for the accompaniment (picture) in the bass part will be lock clamped with the bellow snapped on, it is no further reinforcement necessary. Four reeds are on the reed-block for each chord. 11 accompanying cords with each four reeds result to 44 reeds at the reed-block. Chamber walls are placed only between every 2nd reed (four reeds). Respectively two reeds knock on each other escapes tight so that no air can escape. I glued the reeds with bees wax to the reed-block; it did give more stability at the foot. I expanded the air openings retroactively rectangular. Because the accompanying accords are somewhat too soft for me, however it did not change mach, larger reeds could not to be incorporated in the height. In the mean time however I accustomed myself on that. If I would incorporate again accompanying accord, I would try it with three larger reeds per accord and a single chamber for each reed.
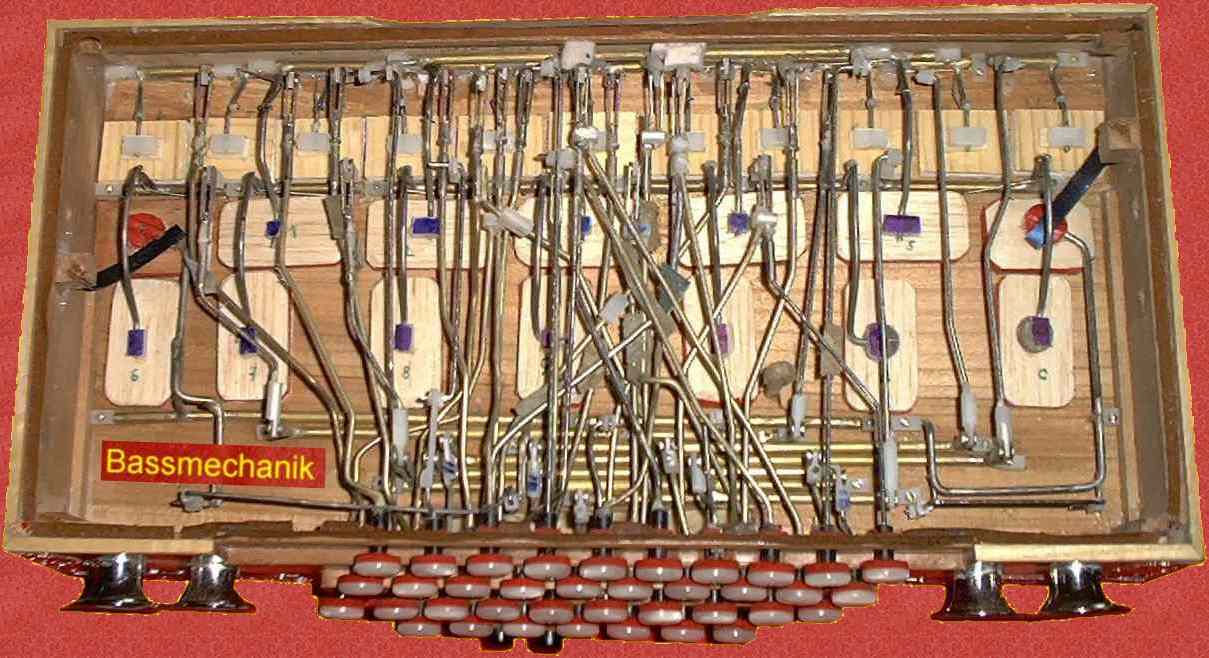
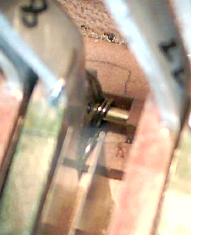
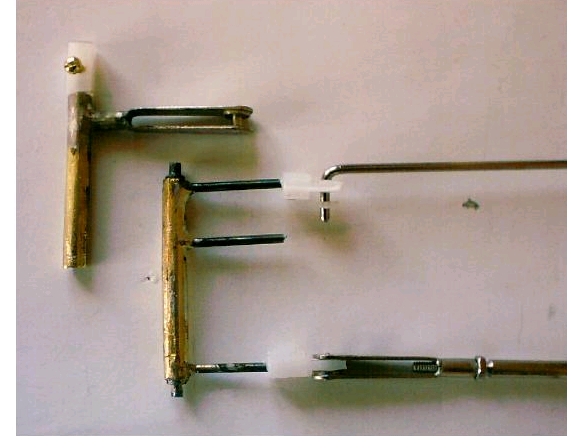
The bass mechanics (picture bass mechanics open) supply became made out of 4 mm brass tubes with 0.5 mm wall thickness that ware accommodated on the ending with 2 mm plugs (3 mm turned down to 2 mm) if lying axes were required. I did cut the joints of the lying tubes out of 4 mm thick PVC plastic. Little blocks with 4 mm to 4 mm of to 8 mm with a 2.1 mm drill hole in along direction and an other drill hole in the middle in breadth direction. Everyone of this rams ware secured with 2 mm wood screws. The linkage needed is in short pieces I made out of 1.6 mm stainless steel wire, in middle lengths linkage I made out of 3 mm hard brass wires and in some parts that need more stability I have made out of 2.6 mm stainless steel wire (Lever of the bass flaps). The joints supplies are almost always made out of a PVC parts (4 mm to 4 mm rejuvenates on 1 mm to 8 mm) a drill hole of 1.5 mm in along direction and of thin ends a drill hole with 1.7 mm. The counterpart is in most cases a part made out of the model building (stainless steel snap on bow with 1.6 mm axis, able to screw on to a 2 mm screw; baud narrow part) or a 1.6 mm wire with attached PVC waver as a secure. At the tubes, the quick levers are hard soldered to the tube
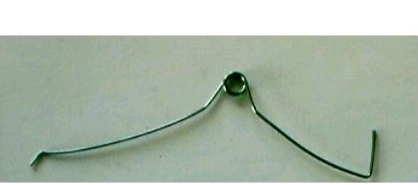
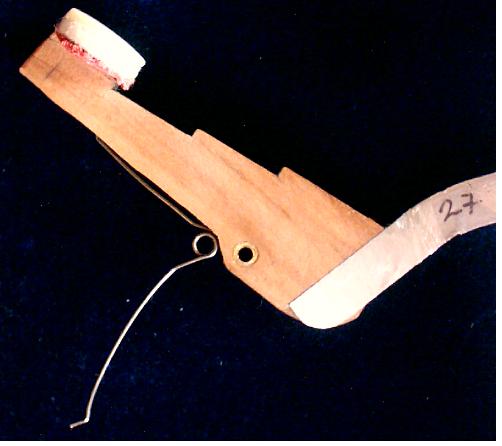
The bass flaps and bass accord flaps are similarly to the treble flaps only larger. The levers are secured to the flaps with a PVC part that is stuck to the flap. The PVC part has a drill hole with 2.5 mm or 1.5 mm according to wire dimension of the lever. In the simplest case, the movement action goes of the air flap to a lever with firm axis of the axis to a joint of the joint over a pole to the key or to several keys. If the key is not attainably this way it goes on to a joint over a pole to the next joint and again to a quick axis on to one or several soldered quick levers this levers respectively go again to a joint and over a pole to the key. One can take the Information form the sketches, which key belongs to the right flap. Three tubes rows are located at the rear wall in the bass part one tube row is between accord air flaps and bass air flaps four tube row for turn around are between bass air flaps and the keys. The keys are arranged in steps and have under lays and felt bearings. The Flaps are kept closed with torsion springs at the tubes. Each spring was prepared made out of piano strings. For the mechanics, mach drilling with little dimensions were needed. I used a little hand drilling machine and a mounted drilling machine and a hard soldering equipment.

The bellows (picture of bellows from the inside) consist of 0.8 mm strong carton material. Not every type of carton is suited for this use. I folded the first bellows myself. The carton used should not be very dry. It is best to store the carton for a week inside a damp cellar. The carton should not be stiff and not made out of old paper. It should retain its folding if possible and the folds should not be springy after it is in use for some time. The fold locations must be exact. It is possible to draw lines with a ruler and then one can score the surface of the carton with a knife before making the folds. One must then press the folds between two disks firmly over night.
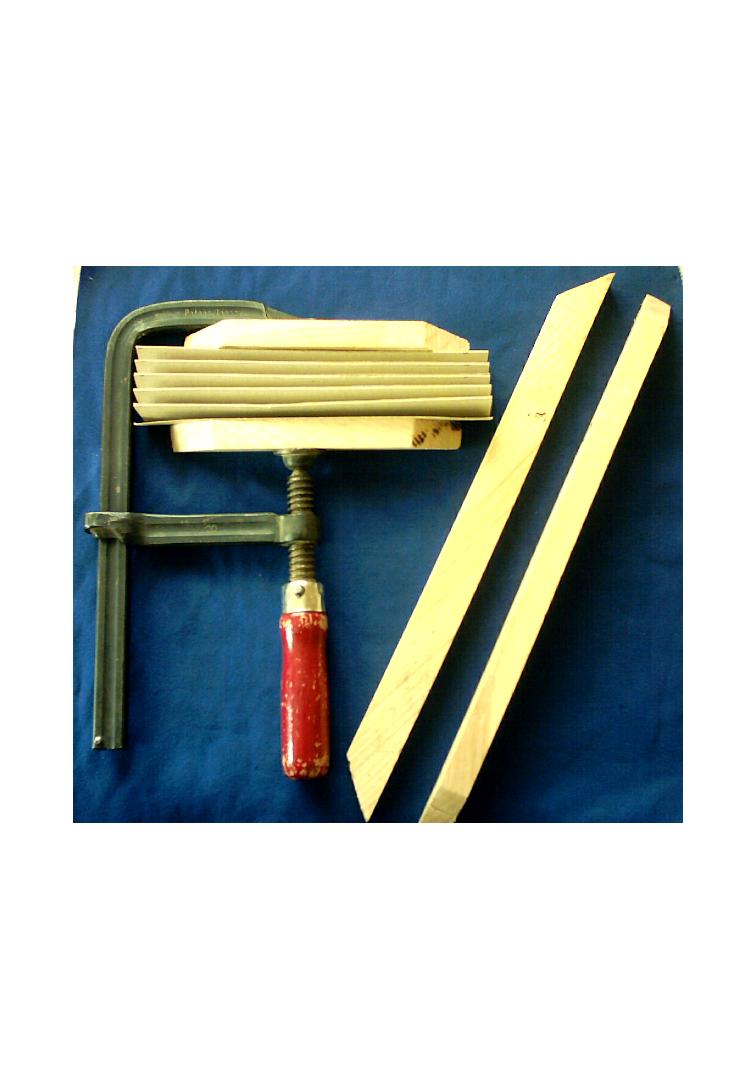
This time I used folded carton material made in Italy. My bellows are made with 13 folds. When constructing bellows, it may be best to first build both wood frames for the bellows: that on the treble side and the bass side. I have glued these wood frames with synthetic cold glue (PV/H PHEX-12 Henkel). I strained the folds with screw clamps between two equally long wood strips, which I made to have the exact same form with cut angels as the closed folded bellows carton must have. The outside dimension of the four folded parts must be exactly the same as that of the frame. For the interior, however, a column of 8 mm must be allowed where the folded leather needs some space.
My bellows have reinforced interior with spruce veneer. In addition, I cut the veneer somewhat smaller than the veneer was glued on the folds. The interior edges of the folds are stiffened with book binding linen. The stiffening of the bellow leads to less overtones being radiated through the bellows and better low resonance quality. After cutting the folds, I glued the folds between the two bellows-frames. After allowing the glue to dry, I pulled the frames with the folds apart. I pulled the bellows-tube with the folds over a large frame. The frame shows the interior dimensions that the bellows have in maximal extension. Bellows-makers have adjustable and revolving frames. If needed, it can also be done without a frame if one has someone to help at the same time. The bellows must in any case stay in an extended condition.
Now, one holds the outside edges of each fold together with some makeshift tape. Into the free space between the folds of the corners, I glue prepared goat leather. The varnished Goat leather must be soft and thin. For splitting the leather, one needs a special machine. I let the leather be prepared for me in a leather business. The form of the leather depends on the folds and has the form of a rhombus. Its size depends on the width of the folds. In any case, the leather must be large enough that at least 5 mm can be stuck to the carton. I paste the leather with bone glue. The leather may be coated with glue only at the edges. The carton is also coated with glue. The leather for the corners is glued with the bellows extended; the leather involved in the fold must be notched e bit by two sides, near the valley off the folds. At the external corners, the leather overlaps and will paste together with the next leather. Check all corners through one by one. It is important that the bellows be air tight.
Next in the process, the decorative paper (gift paper) can be applied. For gluing, thinned cold glue is suitable or wallpaper glue can be used. The decorative paper should soak a little; otherwise it develops folds later on. To cut the decor to the right shape is a bit troublesome. I also have seen that the paper can be glued in its entirety. Now I take the bellows off the frame and compress the folds and latch the bellow. Next, the protruding leather corners are to be pruned. I have no metal corners on my bellows, but rather thin leather strips at the outside of the total edge of all folds, ending at the back of the bellows. I glue these strips also with synthetic cold glue.
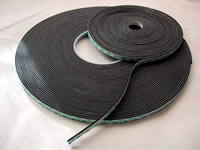
Initially the bellows are stiff and must be pressed. Playing removes the stiffness after some use. An adhesive-backed foam, as used for sealing of windowpane (3M), will be to mounted between the accordion housing parts and the bellows. On my bellows, a frame with a wider decorative strip is mounted only on one side. The second decorative strip (made out of metal) is attached to the bass part. In the assembled state, a symmetrical visual appearance is the result.

 The
images in the text have respectively one left on a larger picture!
The
images in the text have respectively one left on a larger picture!
The building instructions are not complete, and much work is to be supplemented independent.
![]()